version 1.0.3 ©2017 Patrick ‘Kai’ Leahy. Licensed CC0, but attribution would be polite.
- Intended Audience
- Summary of Content
- About the Author
- Starting Out With the Shell
- Navigation
- Syntax
- Redirection
- History
- Substitution
- Unix Utilities
- Environment Variables
- Configuration
- Cheat Sheet
- Problems with this Guide
- Further Reading
Intended Audience
This guide is specifically written for my classmates at Epicodus.
Assumed Knowledge
This page, essentially. You should know what cd, ls, touch, mkdir, mv and rm do. Also, this guide uses
$
to represent the shell prompt. This is a typical convention. Your shell prompt will generally look more like:
Epicodus-9X:~ Guest$
Summary of Content
This guide will cover basic shell concepts and some recommendations for configuration.
It will not cover scripting concerns or programming concepts such as loops and other control structures, and it will not cover variable/string manipulation. Those are extremely powerful features but if there’s any truth to the classic quip by jwz about the challenges of regular expressions, that goes double for Bash. This guide will also omit a full description of regular expressions.
About the Author
Hi, I’m Kai. I grew up in rural Alaska, and I grew up with the Internet. After getting dial-up in 1994 at age 8, the Internet was basically my only link to the outside world. Alaska was awful for me in all sorts of ways. After several attempts I managed to escape its icy clutches, and I found myself half a hemisphere away in Central America. I really wanted to stay down there and so I talked my way into a programming job and taught myself what I needed to know as I went. That worked out more or less okay but in the six years since then I’ve been mostly stuck working on horrible legacy PHP projects, and Central America didn’t turn out to be a good way to meet business contacts. So now I’m putting down some roots in Portland, and loving it so far :)
I’ve used Linux exclusively for about ten years now, and have picked up a thing or two, especially since starting work as a programmer. I am currently attending Epicodus to develop my Javascript and Ruby skills.
Starting Out With the Shell

Welcome to the command line. The shell, like git, is a tool that developers love to hate. They both have complicated syntax and a tendency to punish errant keystrokes.
However, they’re useful enough that we put up with the rough edges, and the larger the codebase you’re working with, the more important they become. It becomes clear pretty quickly that things like mkdir and touch are much faster than trying to create file and directory structures, but the rest of the shell doesn’t exactly go out of its way to teach you what you can do with it, and the Advanced Bash Scripting Guide is not exactly light reading.
This guide is also not light reading but should provide a practical introduction to most concepts and some example usage, specifically for someone who wants to be a developer and not a script writer.
Learning the shell has been a ten-year process for me, and I’m not really an expert. This guide is the stuff I’ve learned and found useful. It’s definitely not all there is to know about this.
What is a shell?
The shell is the thing that executes commands and spits text back at you. You generally use this through a terminal program like OSX’s Terminal.app. On Windows you might use cygwin or the new Ubuntu substystem.
In more general terms, the shell is an command interpreter, which means that it’s actually a complete programming language of its own. You’ll also see the acronym “CLI” thrown around, that stands for “command line interface” as opposed to a “GUI” or “graphical user interface”. Either way it’s a way to talk to the computer in a fairly direct manner.
That is a warning, by the way. The problem with programming is that the computer always does exactly what you tell it to. There is a mistake you can make which is worth explaining before we even get past the introduction.
So you want to remove all the files and folders in some directory, and what you intended to type was this:
$ rm -rf /some/path/to/a/file
But you make a small typo:
$ rm -rf / some/path/to/a/file
This will remove every file that you have access to. If you have administrator rights you can wipe the whole machine, and OSX at least will not stop you from doing this. Be careful what you type. Test commands to see what they do (for example, with :p) before trying them for real. Read the documentation.
Most of the time the only risk you’ll run is having to restore something from source control or backups, but of course that requires you to use those things. And of course the flip side of this is that if you ever do want to do something crazy like type eight characters and wipe the whole machine, you totally can.
Just remember, with great power comes great responsibility. And yes, that’s a line worth stealing ☺
Why learn this?
Programming is fundamentally a way to save human labor, and that includes our own labor. Learning to use the shell effectively will save you labor as a programmer, and the returns on that investment are exponential. The more time you can spend thinking instead of typing, the more you can express in code, and the more you can express in code, the more you can change the world.
Bash Bashing
Bash as a programming language is primitive and ugly as sin, but it will probably run on any Unix-based system without modification. If you really need to be sure of the broadest possible compatibility, there’s an even more primitive version of Bash called POSIX, of which you need to know only that it exists. If you have to worry about whether your scripts are compliant with Bash, POSIX, or something else, you should probably try and use some other tool.
Bash vs zsh
By default on most systems the shell interpreter is a program called Bash. This is basically due to inertia at this point: if you’re a shell script writer and don’t know in what sort of environment your code will run in, it’s best to target Bash since it’s the default on basically all systems. You as a developer should probably use something that sucks somewhat less. My recommendation is to use zsh in combination with the excellent framework Prezto. This guide will note differences between the two where appropriate, but my advice is to just learn zsh.
Neat features of zsh:
- Hit tab almost anywhere and zsh will try to do completion (and expansion)
$ git branch <tab>Will list both local and remote git branches associated with that repo, as well as recent commits.
- Command correction for known commands (you typed
rgep, did you meangrep?) - Smart completion for file paths
$ mkdir some/long/nested/directory/you/dont/want/to/type
$ cd s/l/n/d/y/d/w/t/t
And hit either tab or enter. Zsh will also tab-complete filenames on remote servers, if that’s your cuppa. Here are some other cool zsh features.
Note to Epicodus Students: To start using
zsh, you can typezshinto any terminal.
Note to Mac users: I hear iTerm is pretty cool.
Prezto
Prezto is pretty, fast, easily configurable, and user friendly. It does neat things like tab-autocompletion for git branches (and almost everything else you can think of), syntax highlighting as you type, and powerful history tools. I can’t really praise it enough, and it’s really hard to show you why in plain text, so just use it already ☺
Navigation
You probably know that you can press the arrow keys up and down to go through commands you’ve entered before, but there are some other keyboard commands that do useful things. The way these are typically written is with a caret (^) substituting for the Control key. There’s a reason for this notation, but it’s kinda arcane.
The first one you should know is ^C (ctrl+C). This stops whatever command is currently executing, unless you’ve locked the system up. If that happens you can probably still use the kill command, but you may also contemplate the failures in life that have brought you that point, your worth as a human being, and the fate of your homework assignment before hitting that panic button.
Usually holding CTRL/CMD and pressing right or left will scroll by word instead of by character. Here are a few more commands:
^D: this technically means ‘end of file’ but you use it to get out of things. If you’re using zsh but bash is your default shell, pressing this will get you out of zsh and back to bash. This is also what you use to close SSH connections.^A: jumps to the beginning of the line. You use this when you forget something at the beginning of a command^E: jumps to the end of the line.^Pand^Nmove backwards and forwards (respectively) in [history][#history].^L: clears the screen, just like enteringclearinto the terminal.^R: searches your [history][#history] backwards. This is amazing. My typical use case is when I try a command and it doesn’t work, then I spend some time debugging why, then whenever I get done I don’t want to hit up a bunch of times looking for that previous command. Hit ^G or escape to stop searching.
You can also search forwards in history, but the default command for this (^S) is usually bound to something else. So in order to do that, you need to have the following in your .bashrc or .zshrc configuration file:
stty -ixon
For a fuller discussion of the configuration files, see Configuration.
Syntax
Bash the programming language actually doesn’t have a lot of syntax. Pretty much things are commands, strings, or variables.
How And When To Write A Bash Script
You should dump any series of commands that you plan on typing more than once into a file. Put
#!/bin/bash
At the top of the file, and then use chmod +x to make it executable.
$ chmod +x ~/.local/bin/new_project.sh
Then you can run it by simply typing the name of the file.
$ ~/.local/bin/new_project.sh
If the folder your script is in is in your $PATH you can just type new_project.sh and it will run like any other program.
Do this for things you were going to end up typing anyway. Epicodus students: script your project creation, or use this one. Typing the same thing over and over again is not what programmers do. If you’re doing anything more clever than that, reach for Ruby or Python or even Javascript. For mac users, Homebrew is an pretty good example of shell scripting in Ruby; check out how it works sometime.
Variables
Variables are declared like so:
$ FOO="some string"
and used like this:
$ echo $FOO
some string
or
$ echo ${FOO}
some string
Variables can be optionally given a type. Bash supports integers, arrays, and functions.
And you might think, “variables, great! I’m a programmer, I use those all the time!” Well, not in shell scripts you don’t, because you’re not developing code that way (hopefully). Variables are mentioned here for completeness and so you know what they look like. Try to avoid needing to use them. Do set some environment variables though.
The advanced Bash developer sneers when they read this. They know that Bash variables are powerful and sometimes, the best way to approach a problem with structured text. But if that doesn’t happen to describe you, your cue to rewrite your script in another language is probably about thirty lines, or the use of more than one variable.
Strings
There are several ways to write strings on the command line. Using single quotes:
$ 'This is a string!'
Double quotes
$ "This is also a string"
Heredoc
$ <<EOM
This is a multi-line string. It's closed by 'EOM' on a line by itself
  EOM <-- this does not end the string!
EOM
Strings enclosed in single quotes are evaluated literally (no interpolation or substitution is performed).
$ FOO='bar'
$ echo 'This string has a $FOO'
This string has a $FOO
Double quoted strings will do interpolation and/or substitution
$ FOO='bar'
$ echo "This string has a $FOO."
This string has a bar.
Heredocs can be told to interpolate or not, and they can also optionally suppress tabs. Why tabs? Well, indentation is important in shell scripts too, and you don’t necessarily want that indentation to show up in your output text. The string EOM (for End Of Message) is used by convention, but it can in fact be any character sequence. You are not going to use these very often, but they are really useful for creating other files within a script.
$ FOO='bar'
$ cat <<EOM
This is a multi-line string.
It has a $FOO
EOM
This is a multi-line string.
It has a bar
Add quotes around the delimiter to suppress interpolation for literal output.
$ cat <<'EOM'
This is a multi-line string.
It has a $FOO
EOM
This is a multi-line string
It has a $FOO
Suppress tabs like so:
$ cat <<- EOM
		This is a multi-line string.
	It has a $FOO
EOM
This is a multi-line string
It has a $FOO
The perspicacious programmer will notice that the other examples used echo, and for the heredocs we used cat. Technically heredocs are a form of output redirection, not strings per se, and echo is designed to work with real strings.
Redirection
Pipes
This guy is called a pipe: |. It lets you chain commands together in very powerful ways. Its invention was actually a major milestone in computing (to be fair, 1973 was a far simpler time). We will get more into how you will use this in the Unix Utilities section, but here’s a quick example that I use all the time:
$ du -ha ~ | sort -hr | head -n 20
The first part of the command (du -h ~) lists all of the files in the home directory and their size in a human-readable format (megabytes and gigabytes, rather than just bytes), then passes that to sort, which does what it says on the tin, and then passes the sorted list to head, which gives the top twenty results.
More succinctly, the command gives the top twenty largest files or directories. Pretty neat, huh?
I/O Redirection
Each program that executes in the shell has an input stream, an output stream, and an error output stream, referred to as standard input (stdin), standard output (stdout), and standard error (stderr). There are cases where you care about this, which will be covered later. However, there are some interesting things you can do with file I/O redirection.
$ find . -iname '*.css' > search_results.txt
The syntax is:
$ some_command > some_filename
The example command finds all files in or underneath the current directory, and the > operator writes those to a file. With Bash, > will overwrite any existing content without asking questions. Zsh by default will let you know that the file exists already. You can force zsh to overwrite the file anyway with >| or >!.
If you get a good handle on pipelining, you won’t use this terribly often, but if you’re doing more complicated things than you can express with a single command it can be useful to store the intermediate output somewhere.
In the same sort of vein we have >> which appends information to a file. For example,
$ >>~/.gitconfig <<'EOM'
[color]
    ui = true
[core]
    autocrlf = input
EOM
I’m liable to use this to add config information to the default .atom settings file but that may be the first time I’ve actually had cause to use this. If you are trying to log something using a shell script you might also find a need for this, but if you’re going to log something you may as well use a nicer language to do that with.
The final bit of redirection that you can do is to take a file and slurp up the contents into command-line arguments with <, basically just reversing the operation of >.
$ grep 'class="red' < search_results.txt
You will probably use the pipe character daily, and everything else is more situational. The really-final bit of redirection I have never really found a use for, but if you ever need to pretend for a hot minute that the output of a command is a file, you can do:
$ diff <(ls $first_directory) <(ls $second_directory)
The example given would let you compare the contents of two different directories.
Other Pipeline Elements
So you want to run a bunch of commands on the same line, but you don’t want to actually chain their output. You do that like this:
$ mkdir -p project/{img,css,js} && touch project/css/styles.css
The && means, ‘execute the next command if the previous one was successful’. If you do not care whether the commands succeed you can use ; to separate statements on a single line.
$ rmdir project/font; rm index.html
rmdir: failed to remove 'project/font': No such file or directory
rm: remove regular empty file 'index.html'? y
As you can see, the rm index.html executed even though the previous command had an error. The last thing that you should know about here is the & character. So say you want to start a command, but you don’t care about the output at all. Your command is:
$ some_command &
Note: If you’re reading this and you have a good usage example, please submit a pull request. What this technically does is spawn the new command in what’s called a subshell. It will probably be a very long time before you use this, unless you use Linux and have a bad habit of spawning graphical programs from the command line.
Silencing Errors
This deserves its own little subheader. The idea is that otherwise those errors are going to be passed as input to some other function that’s probably expecting only a list of file names. /dev/null is a special file that discards all input to it, and the 2> refers to the error stream.
There is also a /dev/zero, /dev/random, and /dev/urandom, and these spit out zeros or random numbers until you tell them to stop.
Mostly you need to know that these exist, and that you can do more complicated things with redirecting error and input streams if you really need to.
History
The shell provides some extremely powerful history commands which can basically prevent you from ever having to type anything twice. That’s the good news. The bad news is that you need some basic knowledge of regular expressions for this.
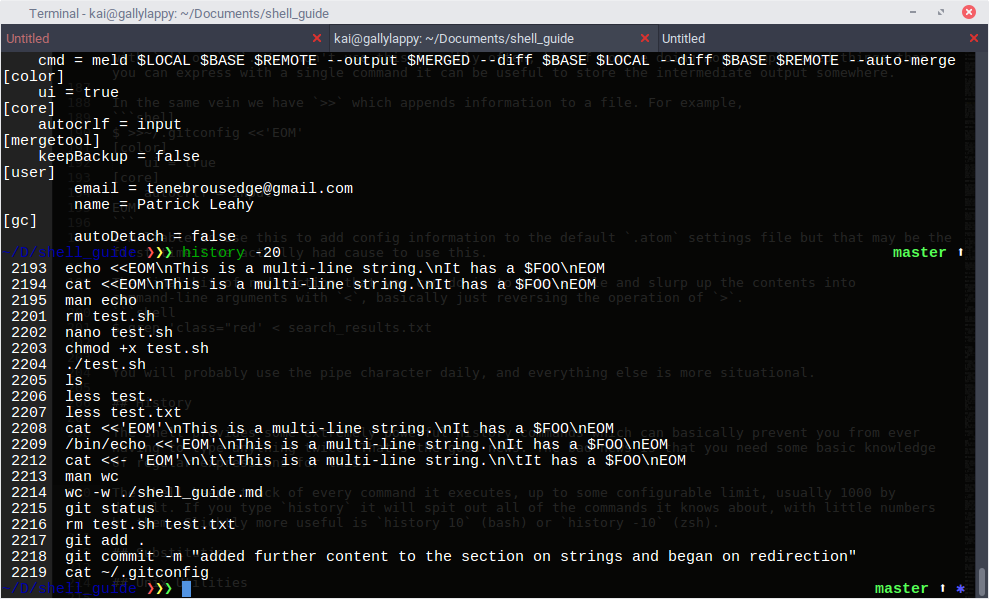
The shell keeps track of every command it executes, up to some configurable limit, usually 1000 by default. If you type history it will spit out all of the commands it knows about, with little numbers by them. Slightly more useful is history 10 (bash) or history -10 (zsh).
 So there are a couple things you’re likely to use all the time, and it’s good to know that the rest of this stuff exists. I’m going to go throught the long form first because it will help you remember the shortcuts, and it may be useful.
Firstly, you can redo any command by using its entry number from the history command as so:
$ !2205
history.png  prompt1.png  shell_guide.md
You can also snag (e.g.) the fifth command back
$ !-5
But far more often you just want the last command you entered, or some piece of it. On Linux I forget to use sudo a lot. sudo is “Super User do”, and you use it when you want to install a program or do something else which requires elevated privileges. Usually after I get done facepalming I’ll do:
$ sudo !!
which repeats the entire previous command, with sudo in front of it.
You can also snag pieces of the previous command. You may recall that in regular expressions the caret (^) refers to the beginning of something (the line, usually) and the $ refers to the end. So you can type things like this:
$ touch abc def ghi
$ echo !!:^
abc
$ touch abc def ghi
$ echo !!:1
def
$ touch abc def ghi
$ echo !!:$
ghi
And all of that said, the thing that you will find most useful is the shortcut for !!:$, which is !$. You will very, very often be doing things like this:
$ mkdir ~/projects/ruby/new_project
$ cd ~/projects/ruby/new_project
You can instead do
$ mkdir ~/projects/ruby/new_project
$ cd !$
I use that one many times per day.
There are other complicated things you can do if you want, e.g. the third and fifth arguments, or a range of arguments, but generally if I need something like that I’ll just hit up and use the ctrl+arrow_key (which if you’ll recall goes backwards by word instead of by character) and just make whatever changes on that line. The command fc is also used to fix commands, but not by me.
Substitution
Curly Brace Substitution
Technically using something like !$ is command substitution, but there a couple of things which deserve their own heading. The first is curly brace substitution, which is extremely useful.
$ mkdir -p projectname/{img,css,js,font} && touch projectname/{css/styles.css,js/scripts.js,index.html}
The first part of that expands to
$ mkdir -p projectname/img projectname/js projectname/css projectname/font
Other ways to use this:
$ mv config{,.backup}
$ mkdir -p ./project/{img,js,css} && touch ./project/{css/styles.css,js/scripts.js,index.html}
$ ln -s /etc/nginx/sites-{available,enabled}/website.local
The first command renames the file config to config.backup.
The second command makes a folder structure (the -p flag creates parent directories as needed) and creates some files inside it.
The third command is what you would use to enable an nginx website. ln -s creates a symlink, which is just a pointer to a file.
Caret Substitution
Another really useful thing is caret substitution, which just swaps one string for another in the previous command.
$ ls some_file
-rw-rw-r-- 1 kai kai 0 Mar 20 16:50 some_file
$ ^ls^rm
rm: remove regular empty file 'some_file'? y
Here we have swapped ls with rm – the idea being to verify that the file exists, and then to remove it.
Global Substitution
If you need to replace a string that occurs multiple times in the previous command you can do this:
$ touch spam spamspam spamspamspam spameggsausageandspam
$ !!:gs/spam/meow/:p
touch meow meowmeow meowmeowmeow meoweggsausageandmeow
gs here stands for ‘global substitution’, and the :p bit at the end of the history command prints it instead of executing it.
Printing commands
The :p trick doesn’t work for everything. As far as I know it only really works for history expansion.
If you have typed out something and you’re not sure what it might expand to, use echo [the rest of the command].
Aliases
If there is some command that you type often, you can save yourself some time by using an alias.
$ alias gpo='git push origin HEAD'
In the example above typing gpo would execute git push origin HEAD. Spaces aren’t allowed after the equals sign. This alias will only persist until you close the window. If you want to make that a permanent alias, you have to put that line in your ~/.bashrc or ~/.zhsrc file.
Don’t go hog-wild with aliases, or at least if you do, remember the commands that they’re replacing, so that you don’t get confused when sitting down to a new machine. Prezto and other frameworks include various helpful sets of aliases for git commands, ruby tasks, and many other common tools.
Unix Utilities
The unix toolbox, comprising the shell and utilities, is ludicrously powerful, which probably has something to do with why you can get them on every major computing platform including (finally) Windows. I do not have a good handle on sed or awk. If someone wants to contribute a short description of the use of those tools, please submit a pull request. Note for anyone else: the reason why I don’t have a good handle on these is that they’re complex and not usually necessary
Finding help
Almost all of the command line tools have a manual, unless it’s something built in to the shell like echo. Type in (e.g.) man find and you will be inundated with information.
If you’re using something like bower which does not ship with a [manpage][manpage], you should be able to get a quick usage guide by passing it the --help flag.
If the tool is extremely badly behaved and does not respond to the --help flag, you can try -h. If none of that works throw away the tool and complain to the author.
It should probably be mentioned that these tools were all written by different people and the flags and invocation tend to be somewhat idiosyncratic. dd is probably the best example of this. It’s a tool you use to copy binary data in very specific ways, but its syntax is like no other utility, because it was written for some obscure IBM system, and there’s no point in changing the syntax of a tool that is in wide use already.
It’s not entirely the case that the shell is buggy and inconsistent. It’s at least more inconsistent than buggy. All together though, it works pretty well.
less
This tool (called a pager) is for when you have a command that spits out ten zillion lines of text and you care about some part of it, or for when you want to just view a file really quickly. Hit ‘h’ for the help menu, and ‘q’ to quit.
$ brew search ruby | less
$ less .gitignore
You can use cat to view short files, but anything longer than 40 lines is probably best viewed with less. It has some search abilities and other useful features.
The one thing it’s not great at is viewing files that are being updated continually (logfiles). For that use tail -f.
Prezto has a neat feature where if you type less it will figure out how long the file is and if it’s only one page it just dumps the text to the terminal.
find
find is brilliant. The general form is:
$ find [location] [options]
You use this when you want to get a list of filenames in a subdirectory that match certain criteria, and especially when you want to do that and then do some sort of function to them. Usually I will use the case-insensitive name search and a glob (wildcard) operator (*).
$ find /etc -iname '*.ini'
It’s good for things where you know some part of the filename but don’t know where it might be. You can also use it to find files that have been modified within a certain timeframe, and you can limit how deep it searches too.
Many uses of find can be avoided with zsh, which has a ** operator which recursively matches subdirectories, so you can do things like
$ rm -i ~/**/*.class
Normally find is just used to list some files, but it also has an -exec option which is often a convenient way to apply a command to the matching files. Find uses {} to represent the file. Why? Hell if I know.
find . -type f -name "*.php" 2>/dev/null -exec php -l {} \; | grep -v 'No syntax errors'
This does a syntax check on all PHP files and prints the ones that don’t pass. Inheriting a repository where the above command is necessary is not fun, by the way. I don’t particularly remember why the 2>/dev/null part was necessary, but for the record that’s how you get rid of error streams you don’t want.
grep
grep is just a text search function just like the ones in whichever graphical code editor you use, but the difference is that you get to use it with the rest of the unix toolchain. You can ask it to look for either literal text or (at least as often) a regular expression.
$ grep -r 'console.log' ./*
The above command will recursively search for the matching string in all files in the current directory (./*) (here the idea is to remove debugging statements before committing). However, if I’m feeling slightly less lazy and want to be more specific about what files are searched:
$ grep 'console.log' ./**/*.js
A slightly contrived example to show grep chaining:
$ brew search ruby | grep rails | grep -v jquery | grep -v redis
That lists ruby packages that contain the string ‘rails’ but not ‘jquery’ or ‘redis’. Doing that any other way sounds like a lot of work.
tail and head
tail is used mostly for snagging the last few lines of an error log file, but as that is an occupational hazard for programmers (like the shell itself!) then it’s actually pretty useful just for that.
$ tail -n 30 /var/log/nginx/error.log
You can also use it to watch files as they are being generated, with tail -f. tail is also used to grab the last few lines of some command output, generally some sort of sorted data. head is the reverse command, grabbing the first few lines of a file or of some command output. It’s less useful, but if all you use it for is listing large files in a directory then it’s still worth knowing.
top and kill
top is a process monitor that lists things in order of CPU usage by default. It can kill things too if you press ‘k’. It will ask you what you want, and default to the highest-cpu-utilizing process. But if you have used the amazing power of your terminal to really lock up the system, your panic button is:
$ kill -9 $(pgrep chrome)
If you happen to know the process id you can give that to kill:
$ kill -9 1233
kill -9 is an extremely rude way to end a process, and the process might be rude back. If your system is locked up and it’s something less than a critical emergency, use your smartphone to Google the things you should do before using that particular number.
Editors: vim, emacs, and nano
If you learn vim, you will never need another text editor. If you want to learn vim, there is a learning game called “vim adventures” which should get you on the right path.
So far I’m not that clever.
vim is part of the POSIX specification and should be installed by default on any system with a unix-based shell (which since Microsoft created a Ubuntu subsystem is all of them).
emacs deserves a mention; it used to be pretty much a 50/50 split between it and vim, but it lost the Editor Wars. Reasons to use it would be “I want a command line editor, but vim is too hard, and I like Lisp and wearing out the control keys on my keyboard”.
My preferred editor is Sublime Text, but on the command line I like nano.
Generally the only time I use this is when editing configuration files, but sometimes it’s useful for doing quick editing on a staging server. I should probably get around to learning vim but it does take a little while to get productive with it. I suspect that the easiest way to learn is to simply use it exclusively for a week.
However, if you want a stupid-simple editor for quick config file editing, nano is hard to beat. It very helpfully prints all its commands at the bottom of the screen, and it can be made to do syntax highlighting too.
ssh
ssh gives you secure command-line access to some other system. This is mostly useful for server administration, which you will do eventually in some capacity. It’s also used by git to talk to remote repositories like (e.g.) GitHub.
If you’re getting tired of typing your GitHub username and password into the CLI every time you want to push some code, congratulations! There’s a better way. Unfortunately for my fellow classmates, we don’t get to use this.
Which is to say, if you want to generate a new keypair every day, uploading it to GitHub and deleting the old one, knock yourself out.
However, since most people will not do this, this section is going to be something less than a full explanation.
Most often with ssh you will be opening a shell on another system, and you may or may not take the time to get your aliases and such set up there. However, if you already know what you want:
$ ssh hostname 'ls -lha ~'
$ ssh hostname 'pg_dump -u user some_database' > database_dump.sql
You can also use ssh to set up proxies and tunnels, but you probably won’t. Do practice good infosec with this tool.
+Your private keys need to be protected.
+Never create a private key without a passphrase.
+Never re-use a key: create one for each site that you want to access, for each machine you access that site with.
ssh-agent will let you get away with only typing the passphrase for your keys once per session.
Further Reading
There are dozens or hundreds of other shell commands which you might find useful, especially in pipelines. You may want to look into the Posix toolset, or find out what Awesome stuff you can do with the shell.
Environment Variables
There are a bunch of what are called “environment variables” that are either always set or that are very useful to set.
$PATH
This is a critical part of how your shell works. This contains all the places that your shell will look to find executables. It’s always set for you, but you may want to add other folders to it.
$ echo $PATH
/home/kai/.rbenv/shims:/home/kai/.rbenv/bin:/home/kai/.local/bin:/usr/local/bin:/usr/local/sbin:/usr/sbin:/usr/bin:/sbin:/bin:/usr/games:/usr/local/games
The format is paths separated by colons. The usual command to add to it is:
PATH=$PATH:/something new
That makes sure that you don’t overwrite some important bit of it. If you happen to do that, you will suddenly lose access to lots of commands.
On the other hand, you can drop your scripts into any folder listed in your $PATH and set them to executable (chmod +x) and they will be available on the command line for you to call like any other program.
$CDPATH
This is not a critical part of how your shell works, but it’s still super useful. If you have all your project folders in a particular place (~/Desktop, e.g.) you can set your $CDPATH to that folder and then cd to any subdirectory without worrying about where you are.
$ CDPATH=~/Desktop/
$ ls ~/Desktop/
project1 project2 projectmeow
$ cd /etc/nginx/sites-available/
$ cd projectmeow
~/Desktop/projectmeow
$USER, $HOME, $PWD, $OLDPWD
These are set by the shell automatically and they can be kinda useful.
- $USER : This is always equal to the current user’s username
- $HOME : This is the user’s home directory. If you’re writing scripts use this and not ~
- $PWD : This is the current working directory
- $OLDPWD : This is the previous working directory
Typing cd - will take you to the directory specified by $OLDPWD. This is useful for when you want to execute a command in some folder but still keep working where you’re currently at.
$ cd ~/Documents/shell_guide && git add -u && git commit -m "adding one character to improve an example" && git push origin HEAD && cd -
$EDITOR
This is used by various command-line tools, including git. If you want to edit your commit messages with atom, you can set
$ EDITOR='atom'
or in your ~/.bashrc or ~/.zshrc file
export EDITOR='atom'
On my system this is set to nano because it’s pretty rare that this gets invoked on something where you want to have a more fully featured editor. More advanced users will set it to vim.
Configuration
Dotfiles and *.rc files
Many tools will read an rc file on startup. Most shells will read quite a number of files on startup. Not all of them will be relevant to your interests. There are some files that are read when you are using the shell interactively and some that are run for non-interactive shells (startup scripts, e.g.).
The files you care about are ~/.bash_profile and (far more often) ~/.bashrc if you’re using Bash. If you’re using zsh then you care about ~/.zshrc. This is where you will put your custom aliases, and set $EDITOR, add anything you need to your $PATH, set up a colorful prompt, and other such things.
If you want to reload your configuration, the following lines are equivalent:
$ . ~/.zshrc
$ source ~/.zshrc
You also have dotfiles which are configuration for various things. Those are the hidden files that begin with a period. Changing any of the config options is, well, optional, but you may want to do so. Generally it’s a good idea to keep your dotfiles under source control but it’s slightly trickier to get those set up on a new machine than your normal git repo, so if you do this, make a script that does these steps for you.
git
git has a number of configuration options which you should set using git --config instead of writing to ~/.gitconfig directly.
It also has ‘hooks’, which are scripts it can run before or after you commit things.
+Post-commit hooks might be useful for, e.g. pushing the commits automatically to one or more repositories.
+Pre-commit hooks are vitally important and will save you from many stupid mistakes.
Yelp has a project called pre-commit that gives you lots of useful pre-commit options out of the box.
You will want to do a syntax check for any css, javascript, ruby or java files that you add to a repository. You will want to trim trailing whitespace. You will want to check for debugging statements so that those don’t get into production code. This guide will be updated at some point with more explicit instructions on how to do that.
A full description of git’s config options is somewhat out of scope for this guide. Check here for more info.
You will potentially want to add things to your ~/.gitignore file. On OSX having .DS_Store in there is not really optional. GitHub has a collection of useful .gitignore files
nano
On Linux, nano comes with a bunch of syntax highlighting files in /usr/share/nano. Drop this into your ‘~/.nanorc’ file:
include /usr/share/nano/*
Those will do pretty well. For those using other systems, there’s also a GitHub repo with improved nano highlighting that you may want to use.
vim
Someone needs to teach me this so I can write this section.
Cheat Sheet
It is strongly recommended that you create your own. This will firm up memory associations.
Problems with this Guide
I use zsh on Linux, so I expect there to be some differences with e.g. keyboard commands on OSX. Please file an issue in the repository and I will update this accordingly. Editing suggestions for style and content should also be reported similarly.